Installation
This section will guide you through setting up a basic Bouncify documentation site from scratch.
WARNING
Bouncify can't be installed on shared hosting. It requires a VPS or dedicated server with root access. If you are using shared hosting, please consider upgrading to a VPS or dedicated server.
INFO
For upgrading your existing Bouncify installation, please refer to the Upgrade Guide for detailed instructions.
Server Requirements
To run Bouncify efficiently, ensure that your server meets the following requirements. These include the web server, PHP version, necessary extensions, and database requirements. For more detailed specifications, please review our comprehensive Server Requirements Guide.
Web Server
- Apache, nginx, or any other compatible web server.
PHP Requirements
- PHP Version: >= 8.3 (Recommended: Latest stable release of PHP 8.3 or 8.4)
- Required PHP Extensions:
- BCMath
- Ctype
- cURL
- DOM
- Fileinfo
- JSON
- Mbstring
- OpenSSL
- PCRE
- PDO
- SQLite
- Tokenizer
- XML
- ionCube Loader® v13.0 (Ensure the latest version is installed and compatible with your PHP version)
Database
- MySQL: Latest version recommended (minimum MySQL 5.7 or MariaDB 10.2)
Recommended Configurations
For optimal performance:
- Use nginx as the web server for faster performance and scalability.
- Enable Opcache to improve PHP execution speed.
- Allocate sufficient memory (
memory_limit) in yourphp.inifile (e.g., 1024M or higher).
Verify Your Server Setup
Run the following command to check your PHP environment and confirm required extensions are enabled:
php -m
This command will list all installed PHP modules. Cross-check it with the list above to ensure compatibility.
WARNING
This project utilizes the latest Laravel version (currently 11.x). Refer to the Laravel documentation for more information.
The root folder for Laravel is /public. Do not install it in a sub-folder; using a sub-domain is preferable over a sub-folder. We do not support installing our product in a sub-folder.
How to Get a License
To use Bouncify, you must enter a valid Envato Purchase Code. You will receive this code after purchasing the item on CodeCanyon. Please refer to the License Activation Guide for detailed steps on how to activate your copy.
Install via One-Click Installer
- Create Database and Upload Files
- Upload all files into the root folder of your hosting (typically
public_html)
- Start Installation
Navigate to
your-domain-name.com/installto begin the installation process.Follow the step-by-step installation wizard:
Step 1: System and Requirements Check
In this first step, the installer performs two important checks:
System Requirements
- Verifies PHP version (8.2 or higher)
- Checks required PHP extensions
- Validates server configurations
Directory Permissions
- Ensures critical directories are writable
- Confirms file permissions are correctly set
All items should display a green checkmark. If you see any red indicators, you'll need to resolve these issues before continuing.

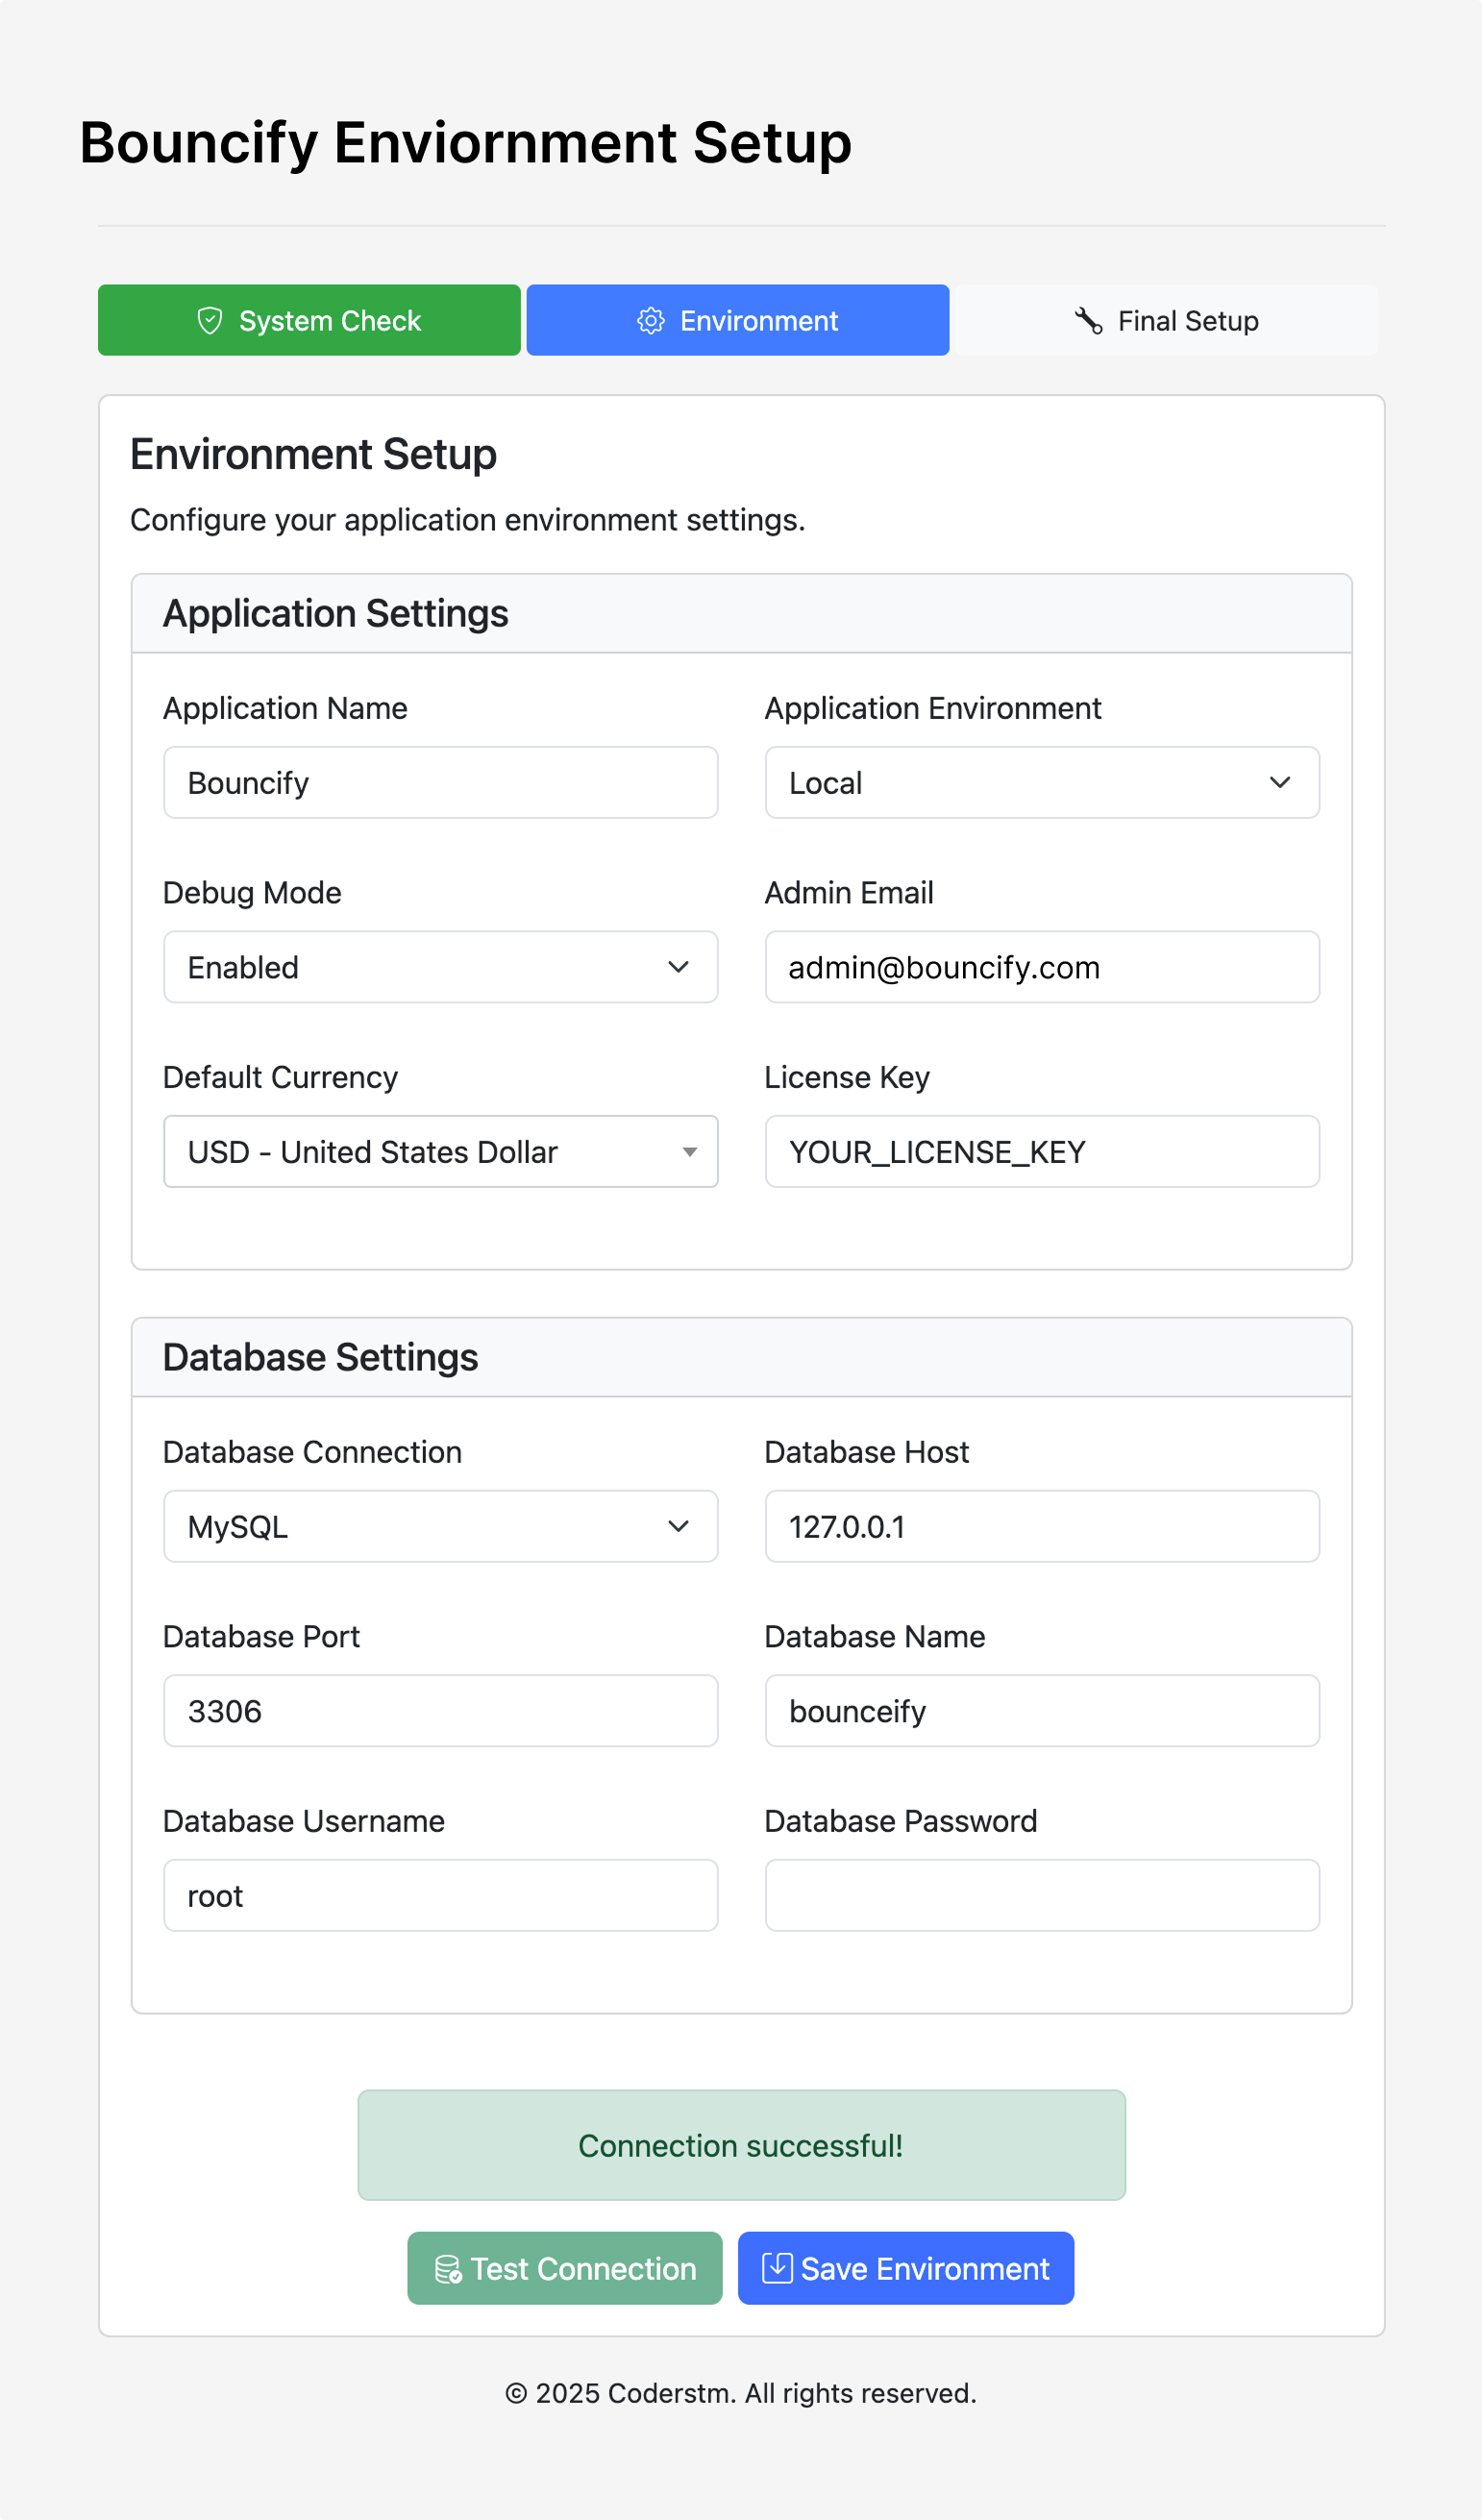
Step 2: Application & Database Setup
Here you'll configure the core settings for your application:
Application Settings
- Application Name: Choose a name for your Bouncify installation
- Admin Email: This will be your administrator login
- License Key: Enter your valid license key (purchased directly from our website)
Database Configuration
- Database Name: The name of your MySQL database
- Database Username: Your database username
- Database Password: Your database password
- Host: Usually "localhost" unless using a remote database
- Port: Default is 3306 for MySQL
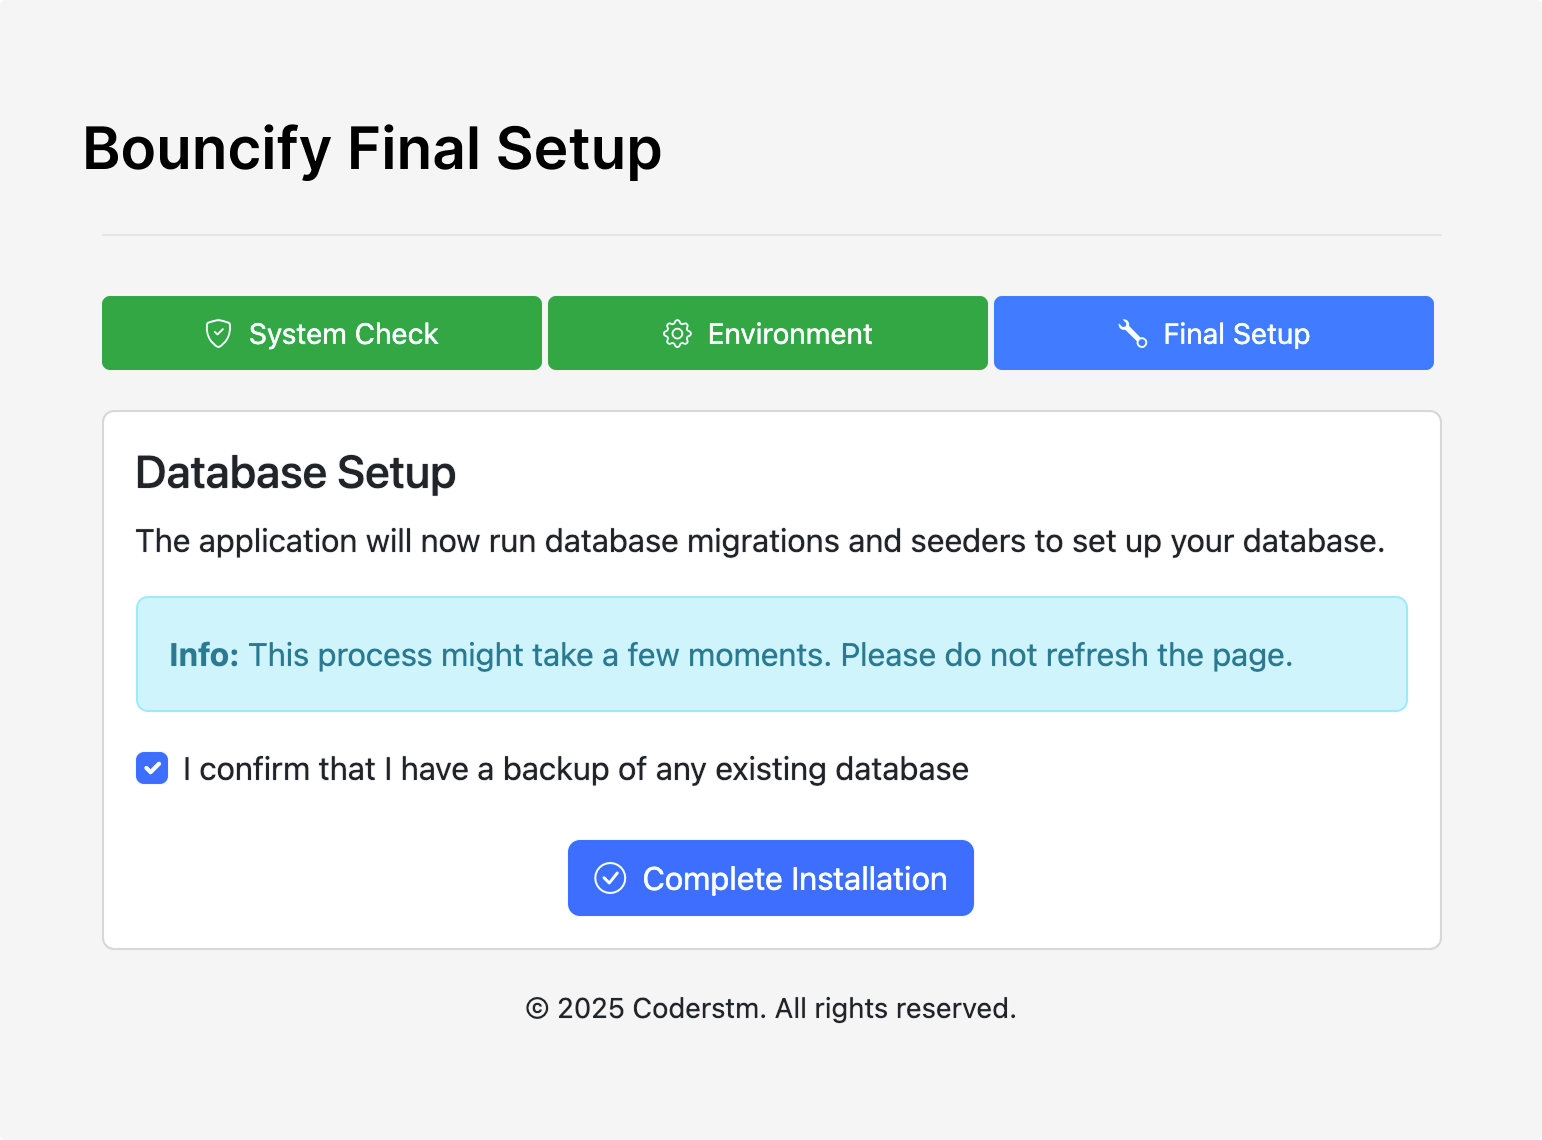
Step 3: Installation Process
During this step, the installer will:
- Connect to your database
- Create required tables
- Import initial data
- Configure core settings
- Set up required services
The progress bar shows the current installation status. This process typically takes 30-60 seconds depending on your server.
Step 4: Installation Complete
Upon successful completion, you'll see this confirmation screen with:
- Success message
- Admin login URL
- Your admin credentials (email and password)
- Additional important information
Be sure to save your admin password before navigating away from this page!
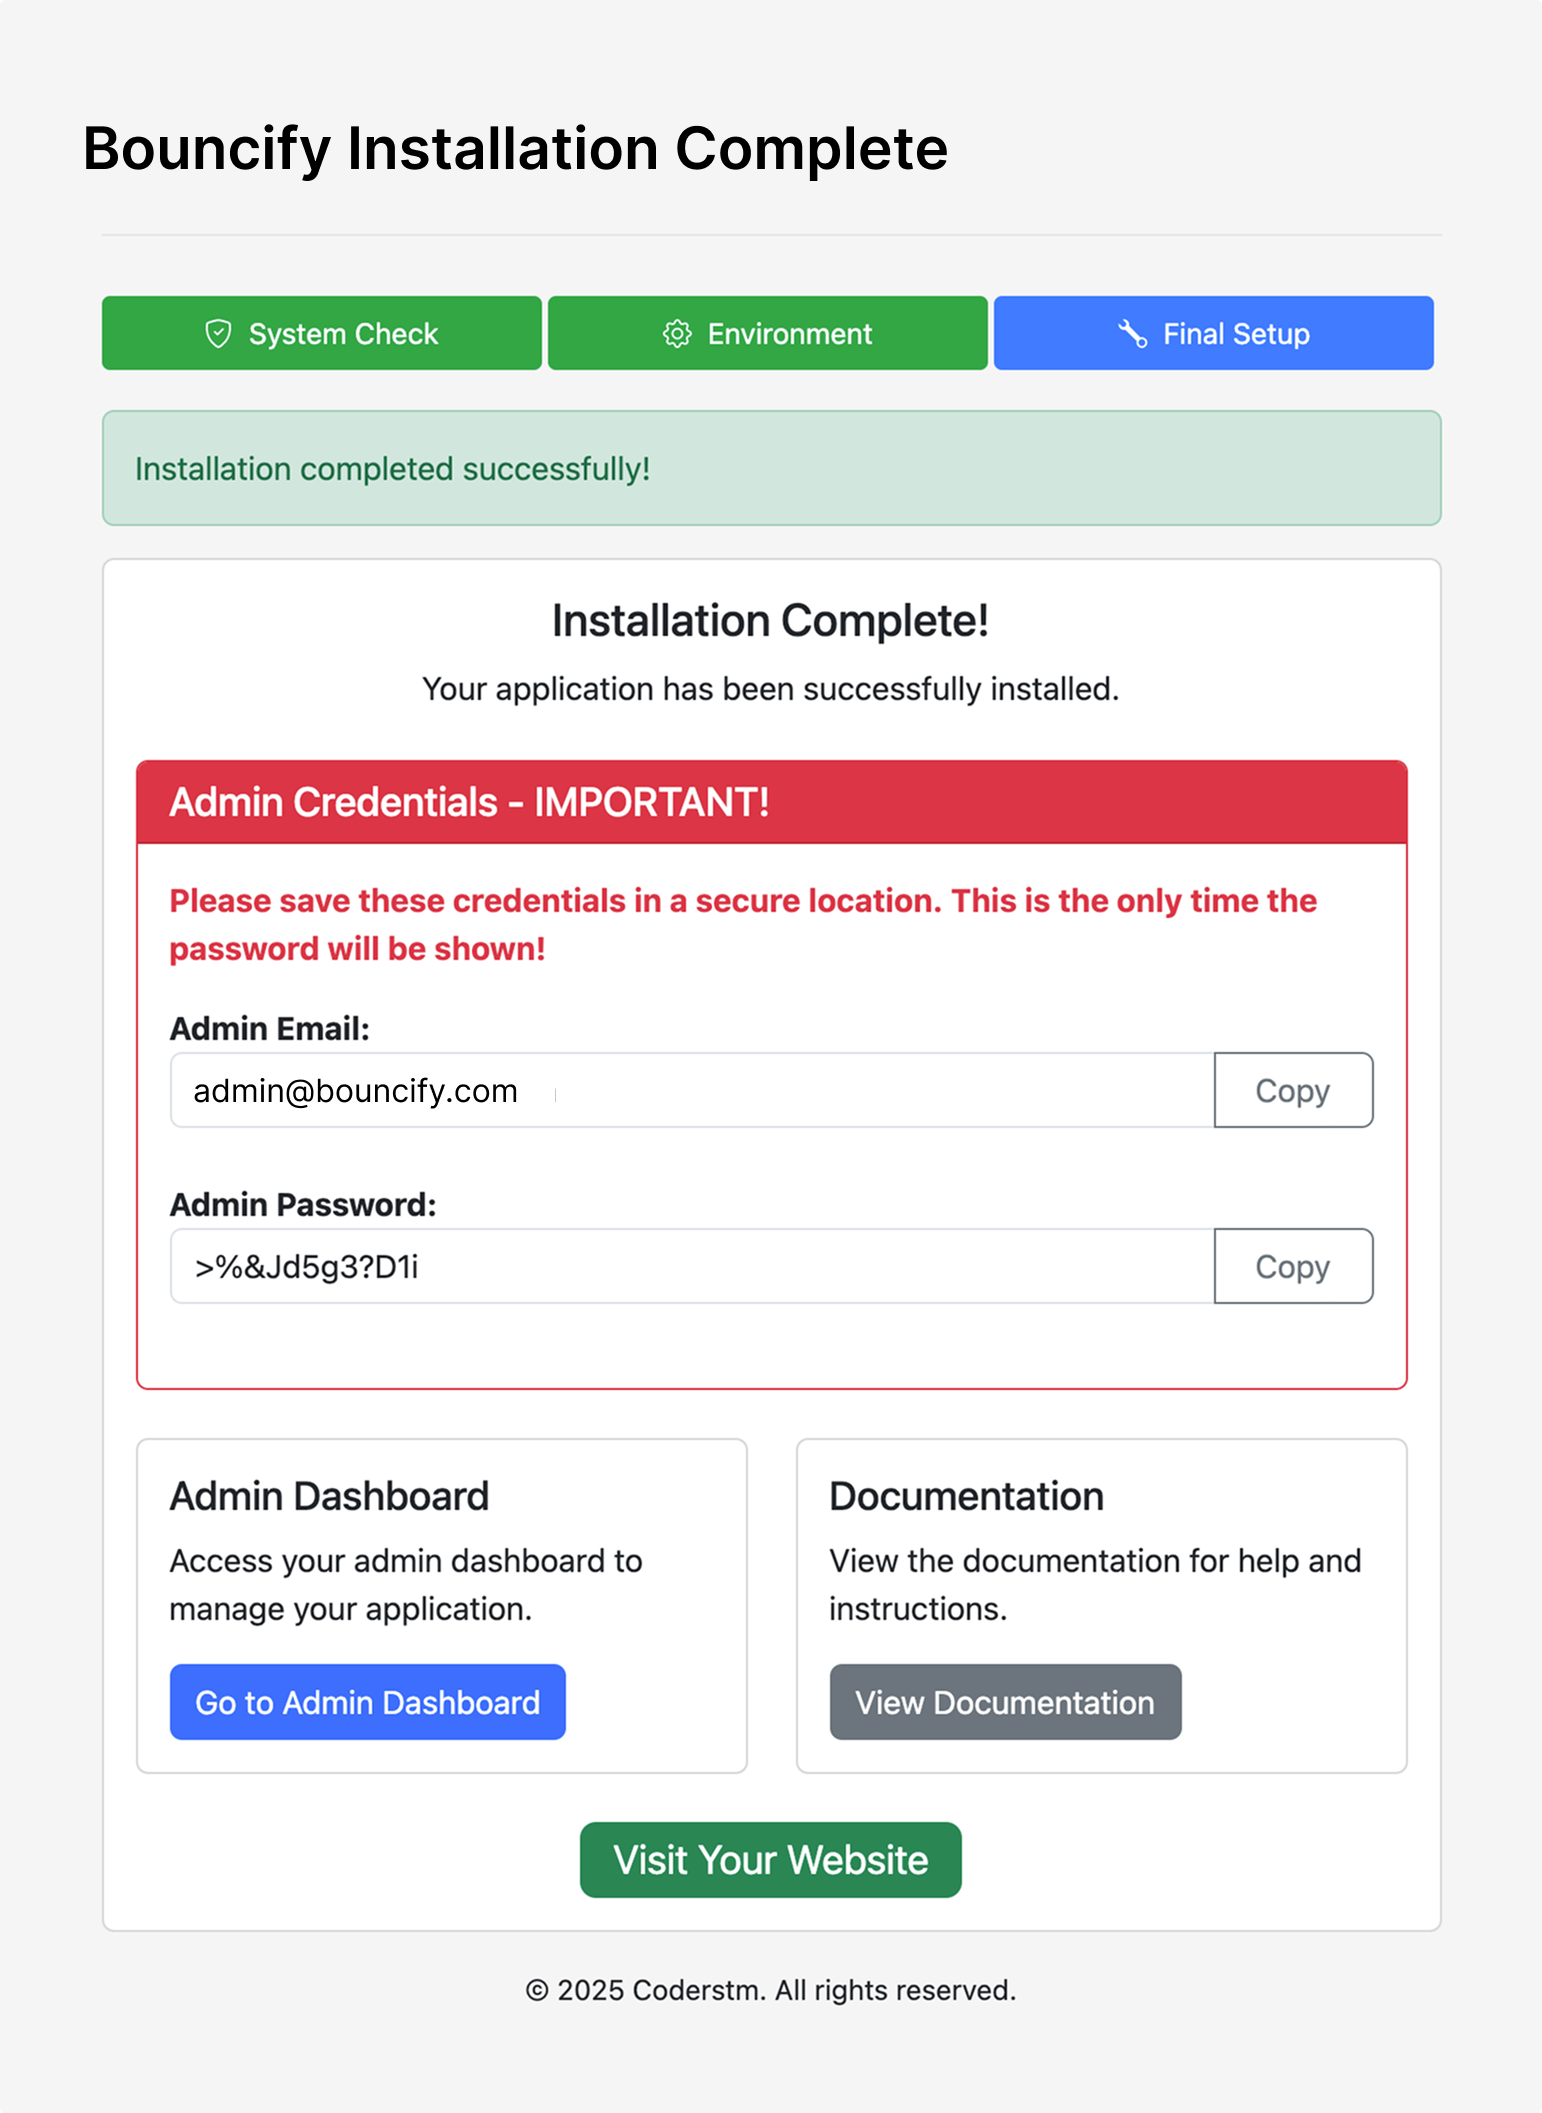
Click the "Go to Admin Dashboard" button to access your new Bouncify dashboard.
Add Cron Jobs
Cron jobs are scheduled tasks that run at predefined times or intervals on your server. They are essential for automating repetitive tasks such as running scripts, performing maintenance, or triggering specific actions at set times.
To set up cron jobs for Bouncify, add the following lines to your server's crontab:
# Find your PHP path using 'which php' command and replace as needed
* * * * * /usr/bin/env php {project-root}/artisan schedule:run >> /dev/null 2>&1
Replace {project-root} with the actual path to your Bouncify project. The /usr/bin/env php approach works across most systems, but you can specify the full path to your PHP version if needed (e.g., /usr/local/bin/php or /usr/bin/php8.2).
Post Installation
After completing the installation, refer to the Post Installation Guide for additional setup steps and best practices to ensure your Bouncify site runs smoothly.